Video Editing in Windows 10

Did you know Windows actually has its own built-in default video editing app?
It’s intuitively called ‘Photos’…
Yep, that same app that you open every image with by default is actually a video editor too – and quite a powerful and easy-to-use one!
Let’s begin!
Before we start - compatibility check
To begin, make sure you have the latest Windows operating system – Windows 10 (OS build 17134.0 or higher).
Please use this guide here to determine your current version of Windows.
This is important as older versions of Windows, such as 7 or 8.1, will not have the Photos app installed and the app cannot be downloaded and installed on these devices.
If you do not have Photos installed, please download via this link here.

Part 1 - Importing your video
1. Open the Photos app in Windows, either by hitting the Start icon key (a) on your keyboard, or clicking in the Cortana search box (b) in the taskbar, and type Photos then hit Enter on your keyboard.

2. Photos will load the Photo view by default and show you all images and videos that are saved locally on your hard drive under the C:\Users\username\Pictures & C:\Users\username\Downloads file-paths.
You can manually add other file-paths, such as a custom folder you have created for your unit by going to the top-right corner of the Photo app and selecting the drop-down menu, as per below:
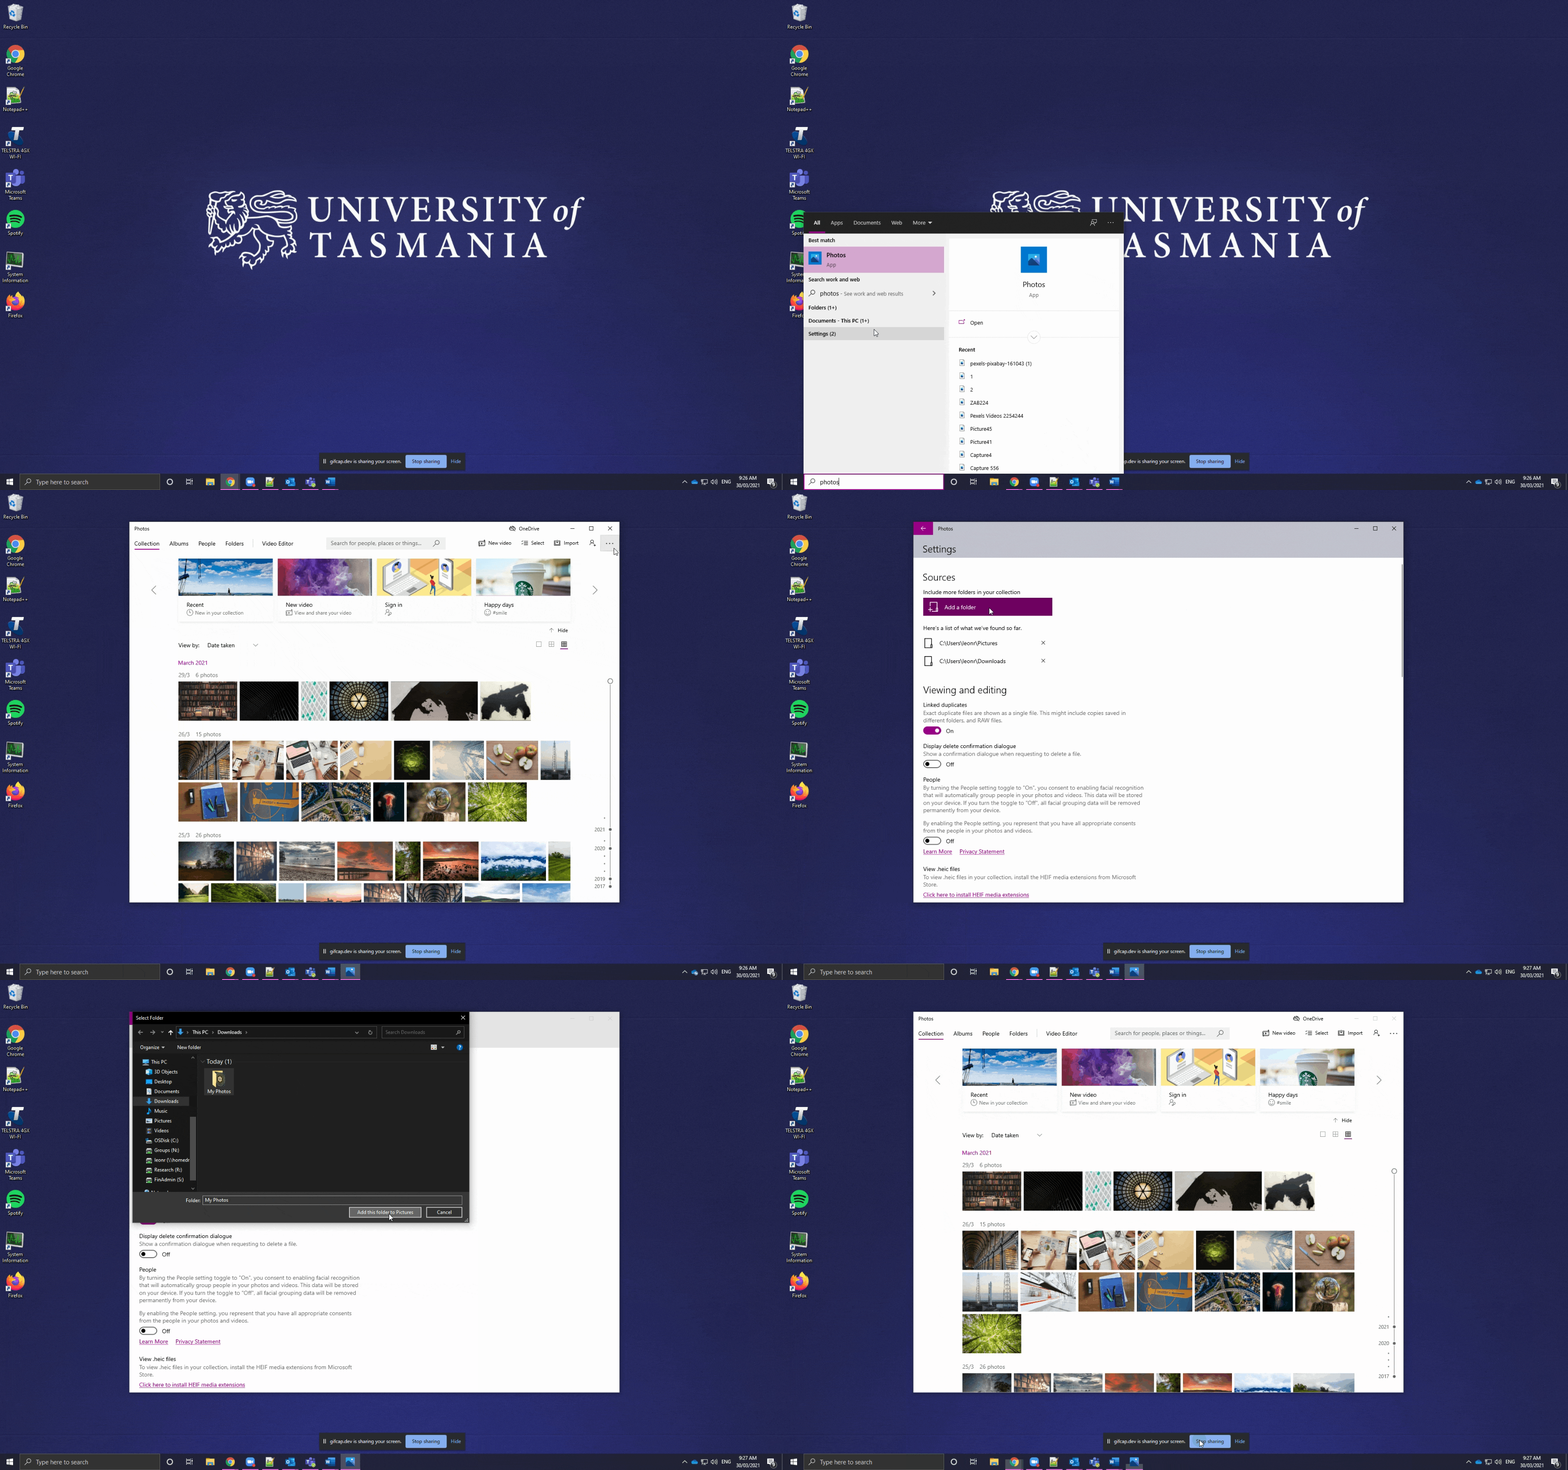
Then select Settings and then under Sources click on Add a folder, then browse to your custom folder and click the Add this folder to pictures button.
3. In the top-left navigation bar, click on Video Editor to switch into the Video Editor view (you can click Photos to go back to the default Photo view).
4. In the Video Editor view, you will see all video projects you have created. Click on the New video project button to get started on a new project.
5. You will then be taken to the Video Editor itself and will be prompted to name the new project/video.
6. Enter a name and click OK, or Skip this step if you do not want to save the project.
7. You will now see the Video Editor with the following sections: Project library, Storyboard, and Preview.
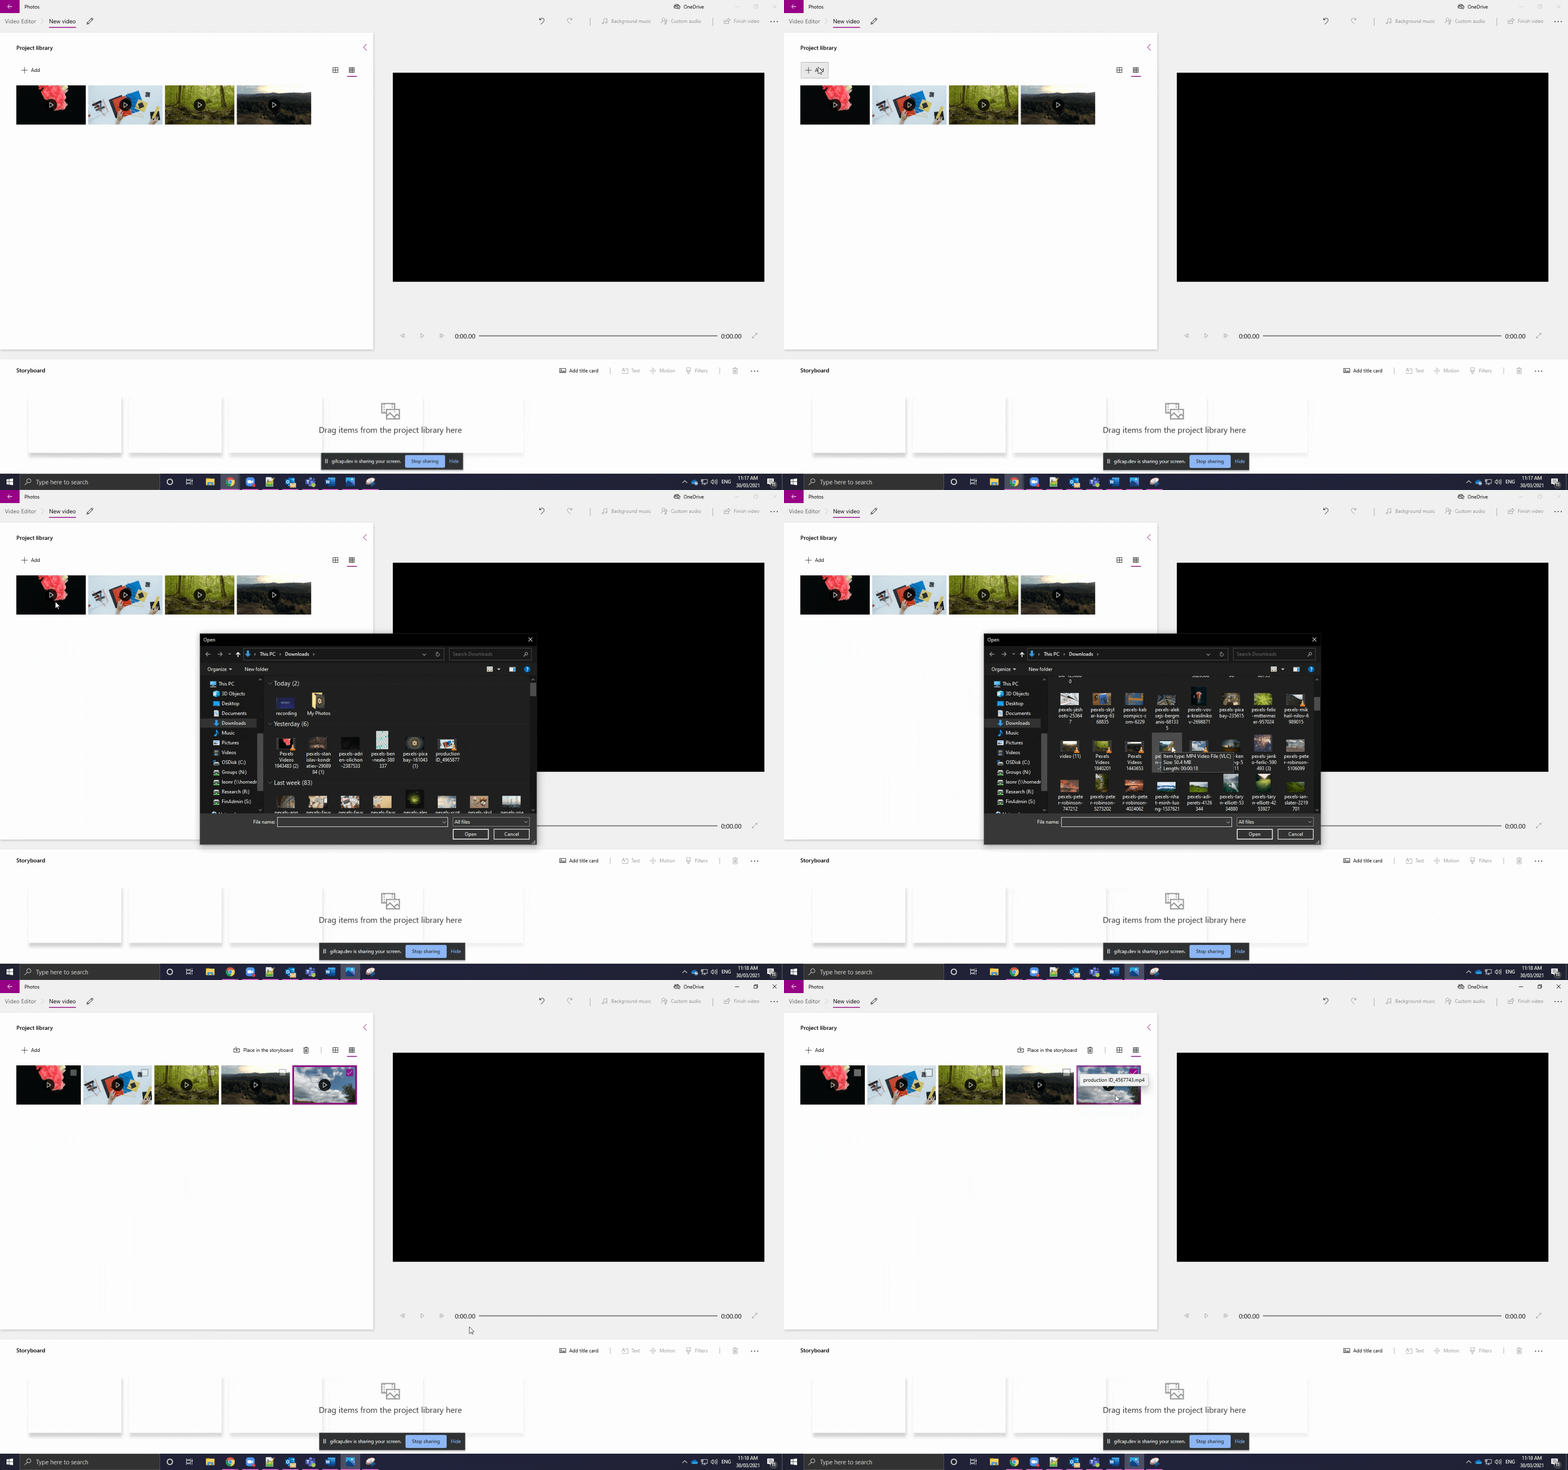
8. To import a video you have recorded, click the Add button under Project library. You will then need to navigate to the folder where the recording is located, as per below:
Part 2 – Editing your video
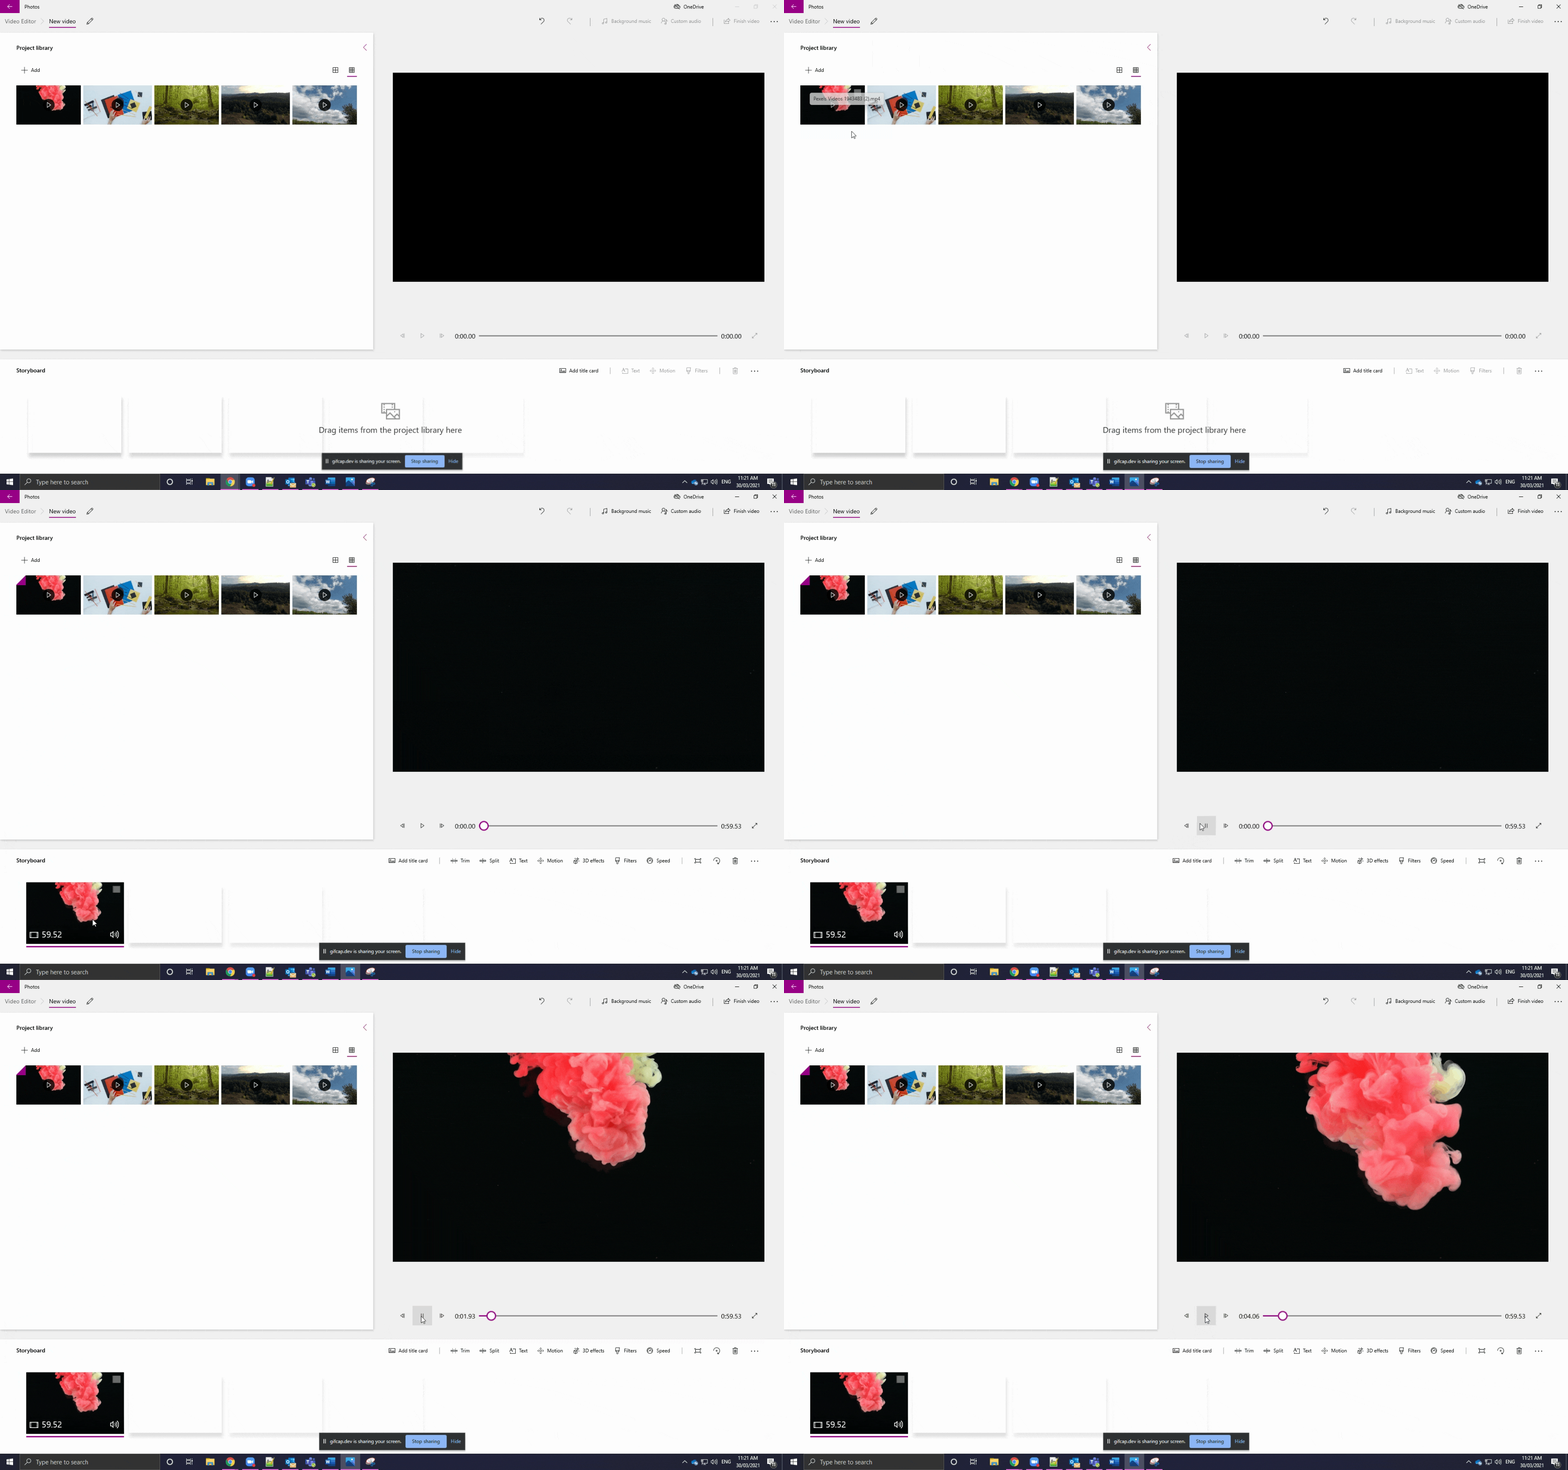
1. Once you have imported the video, we now need to drag or move the video to the Storyboard. this can be done by dragging the video, as per below:
Or by selecting the video and clicking the Place in the Storyboard button, as per below:
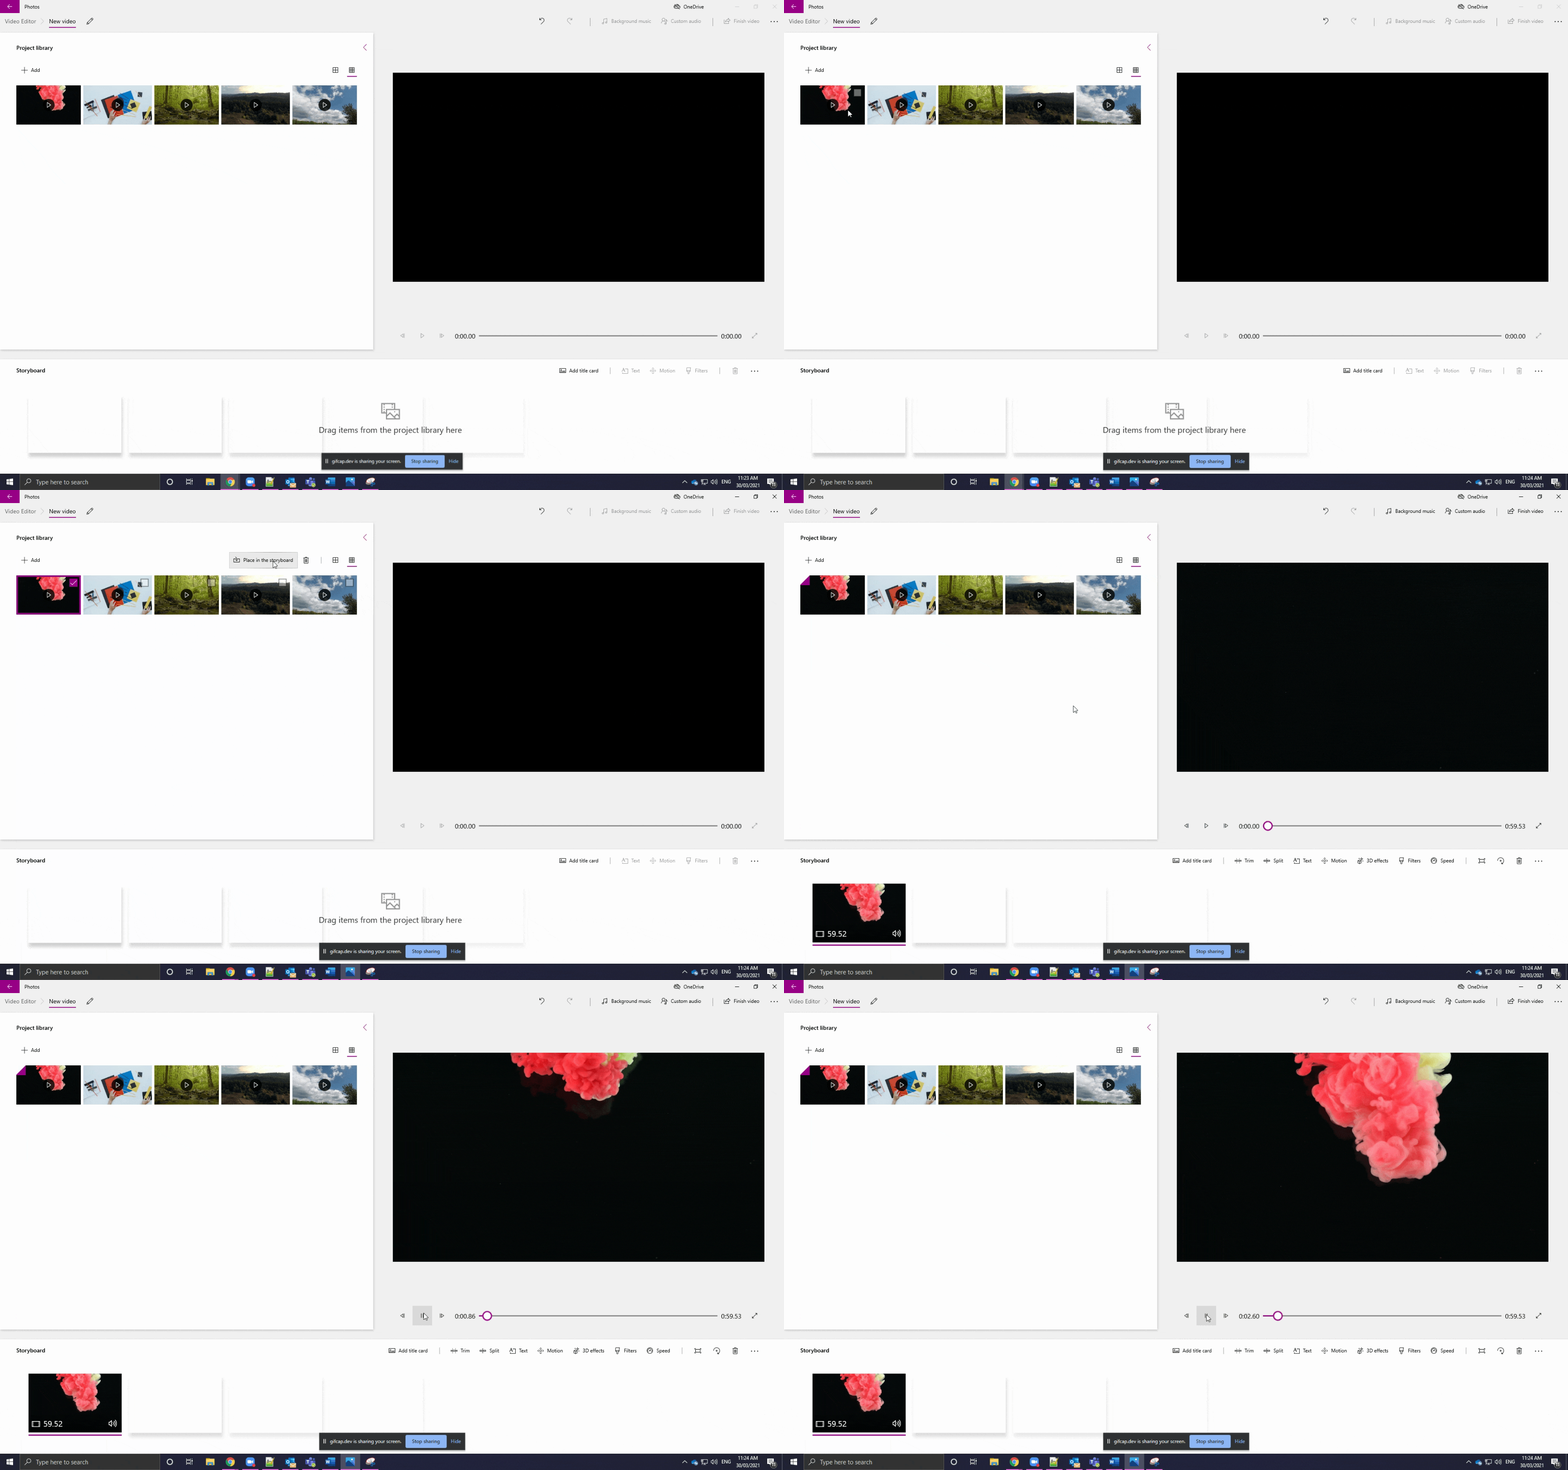
2. Once the video is in the Storyboard, we can start editing the video. Below are a few common edits that you will usually make to recorded videos:
Scenario 1:
- Need to remove either the beginning or the end of a video, or both:
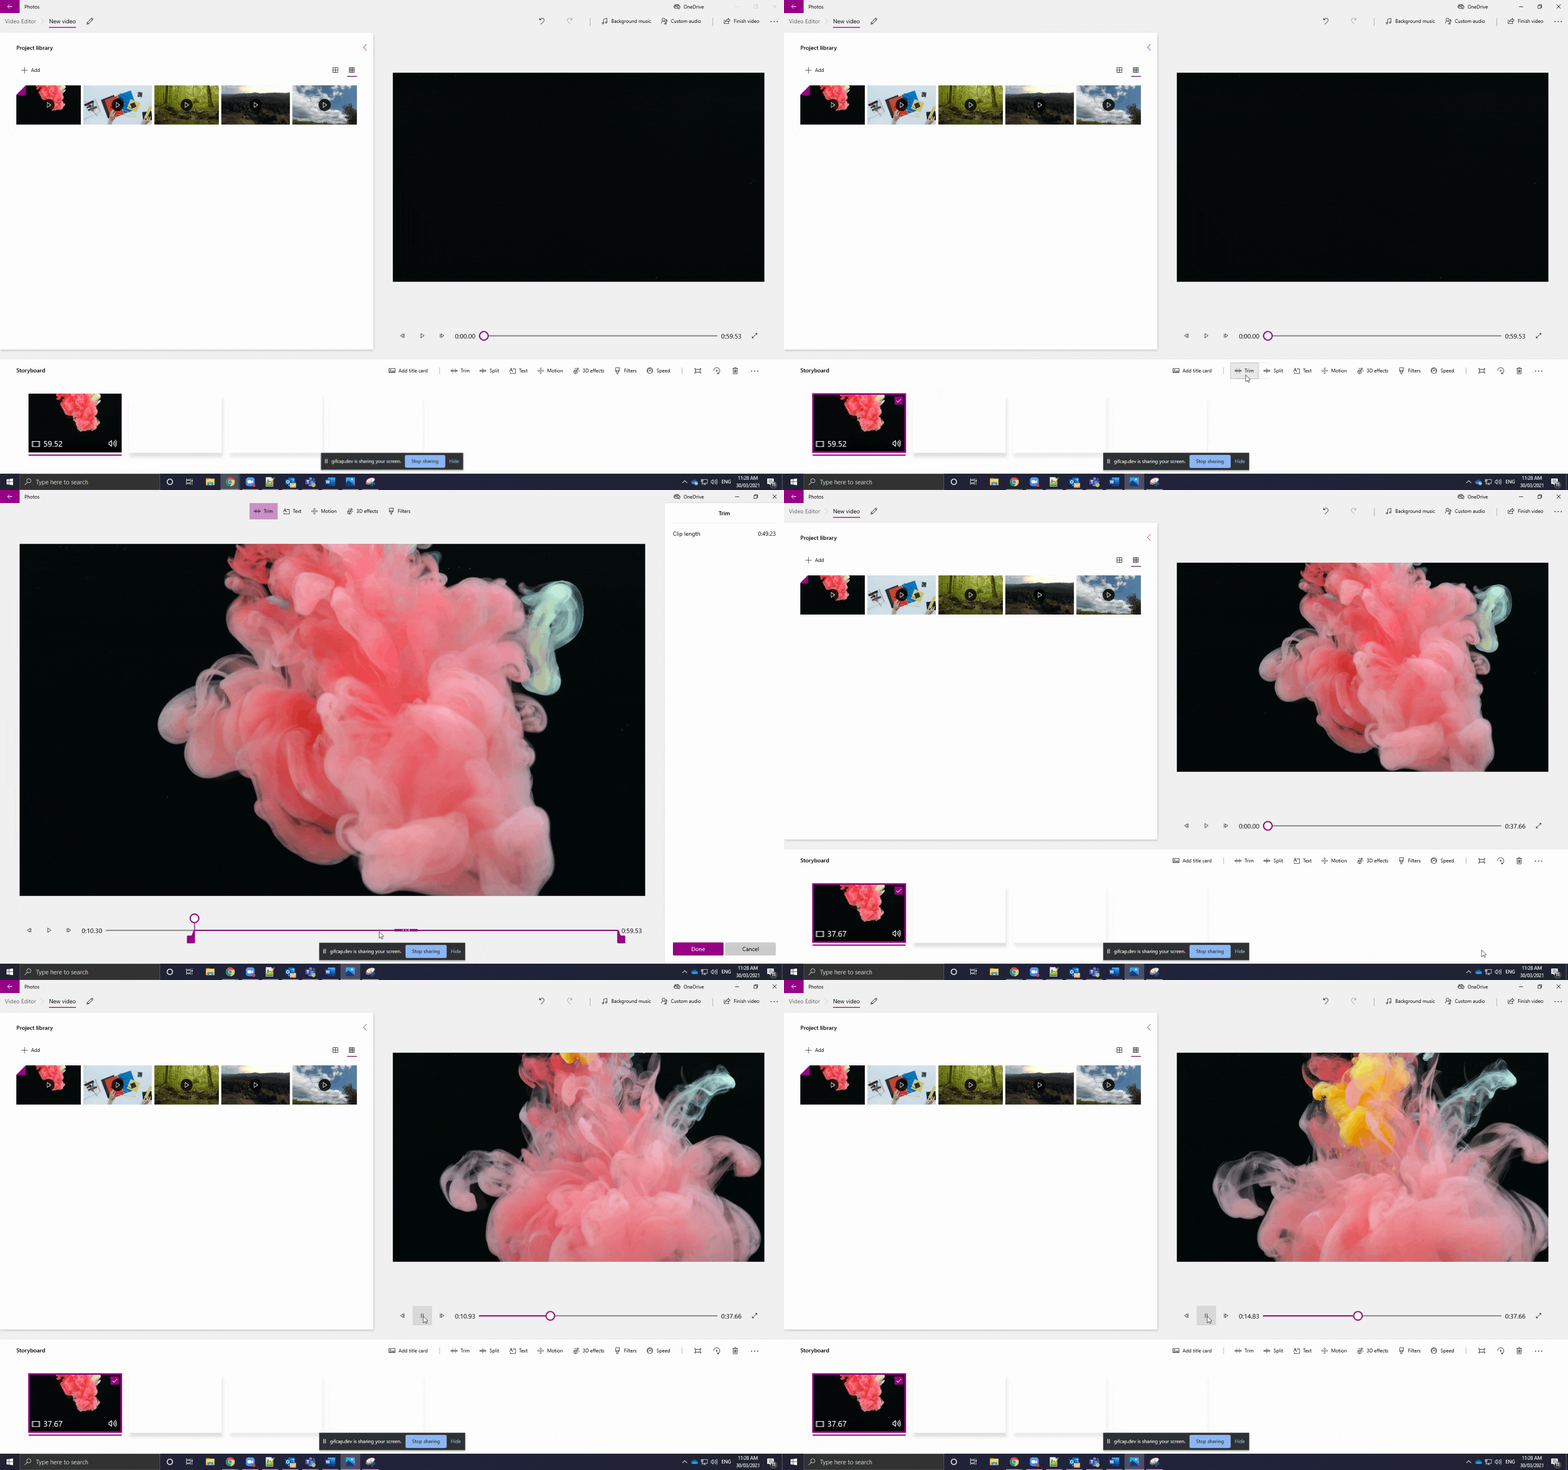
Scenario 2:
- Need to remove a section of the recording in the middle of the video:
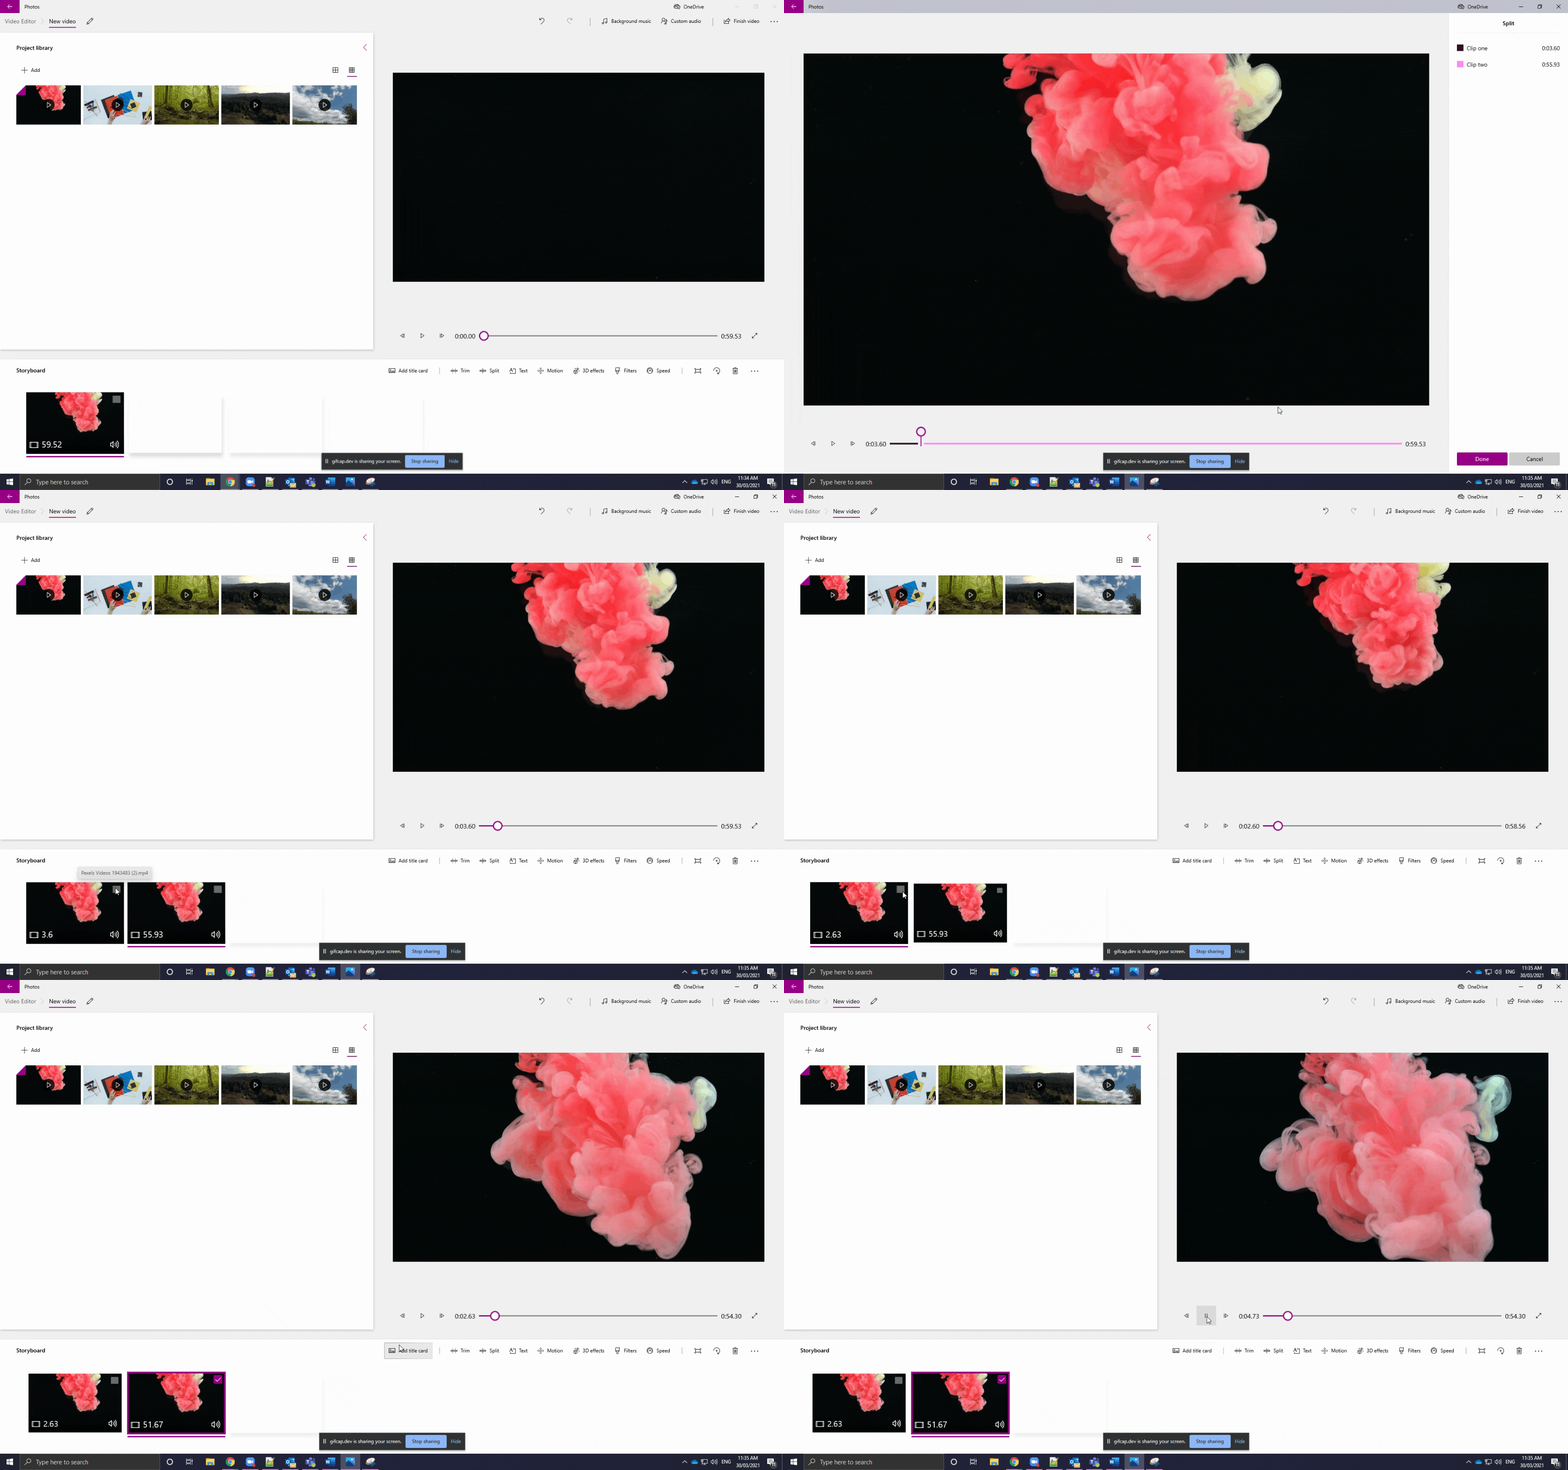
You can split a video several times to create unique sections, which you can edit individually.
Each individual section has a start and end point which can be further 'trimmed' to remove unwanted content.
To delete any section, select the unwanted section and click the delete button, circled below.


Part 3 - Creating titles
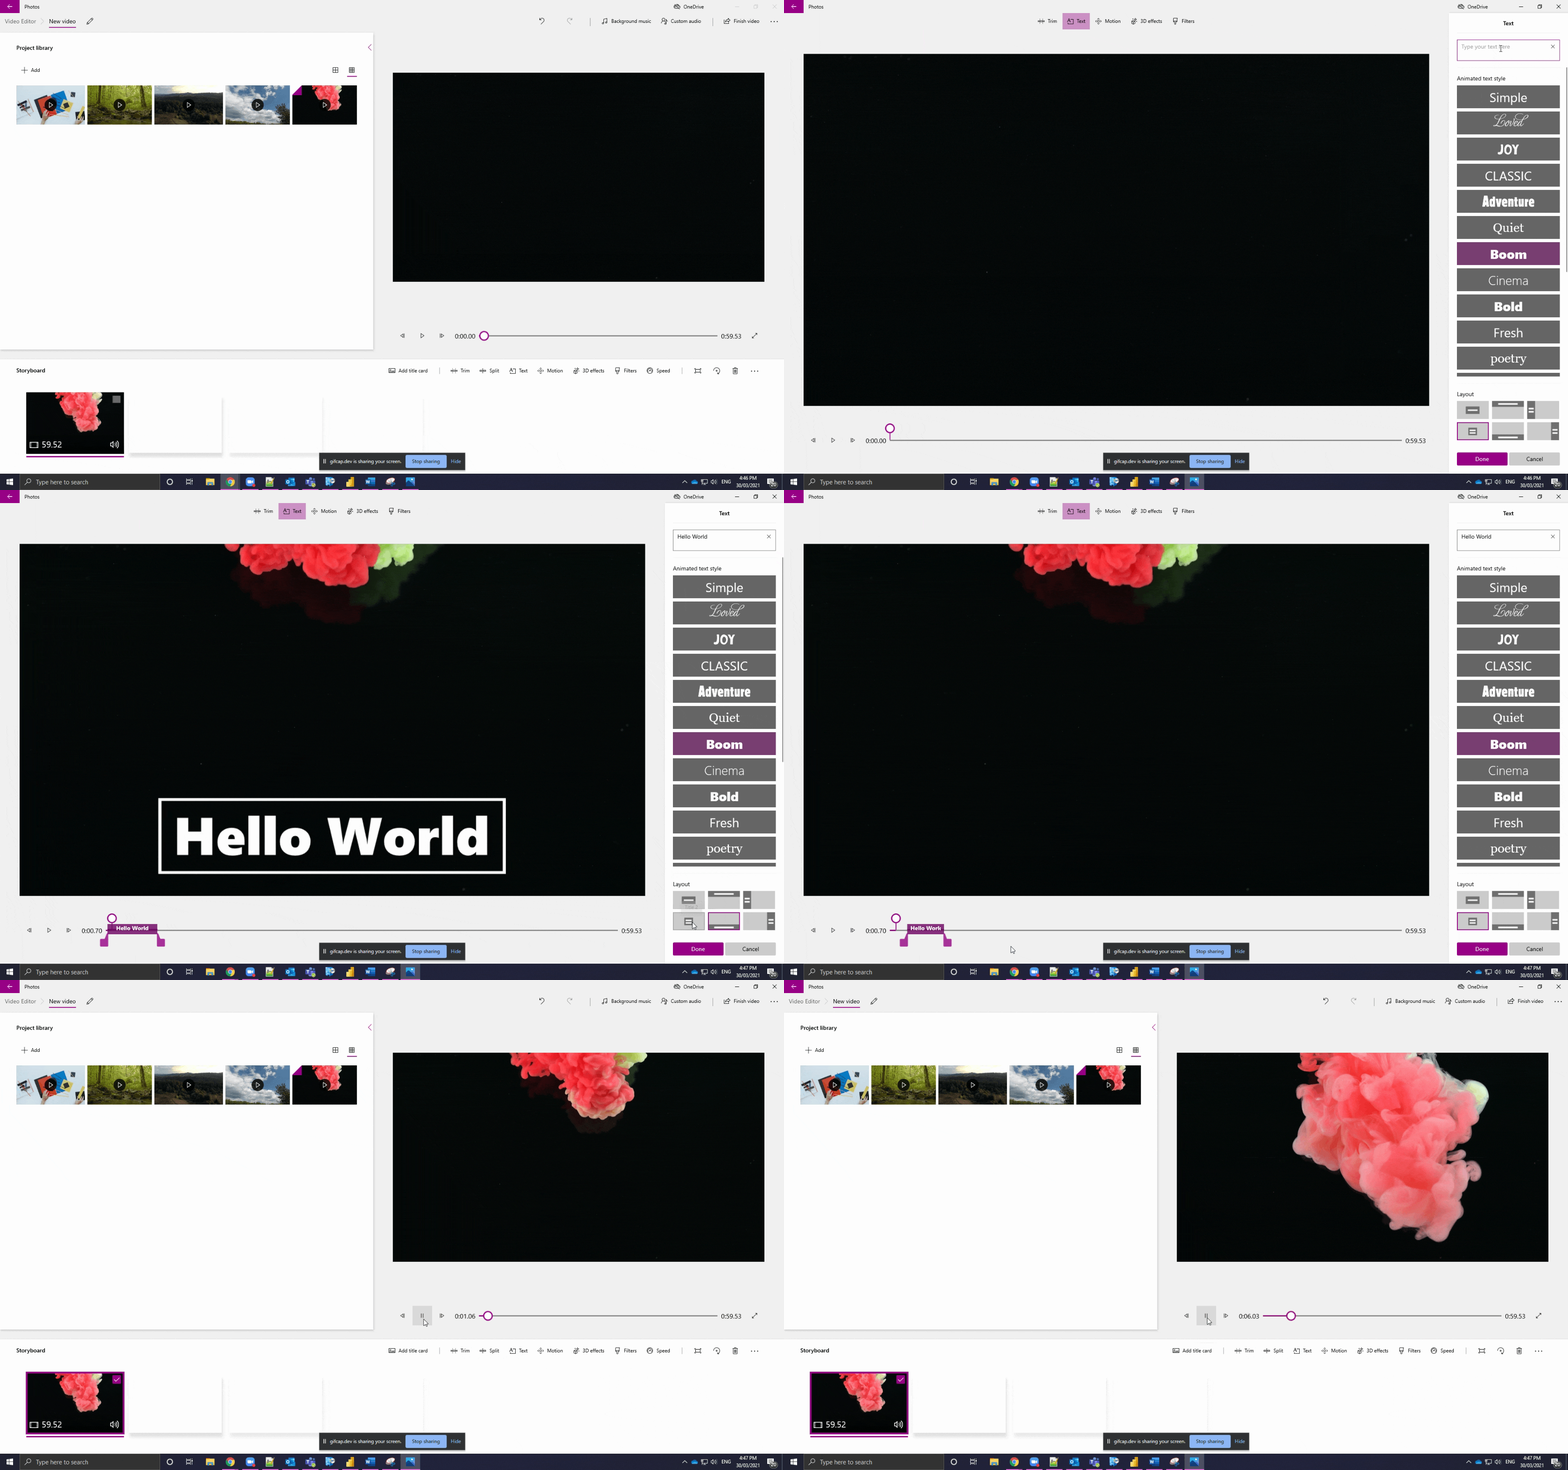
Option 1. You can add overlayed titles to the start of your video.
1. Select the video in the Storyboard and then click Text.
2. This will open the Animated text menu, where you can add small amounts of text in a number of font/animation styles.
3. Type your title text in the top-right text field and then select the font/animation style and choose the layout.
4. Adjust the text overlay start and end points using the slider toggles at the bottom of the page. This is where you want the text to come in and then disappear.
5. You can preview the changes using the playback buttons in the bottom-left. When you are finished, click Done.
Option 2. You can add a title section to the start of your video.
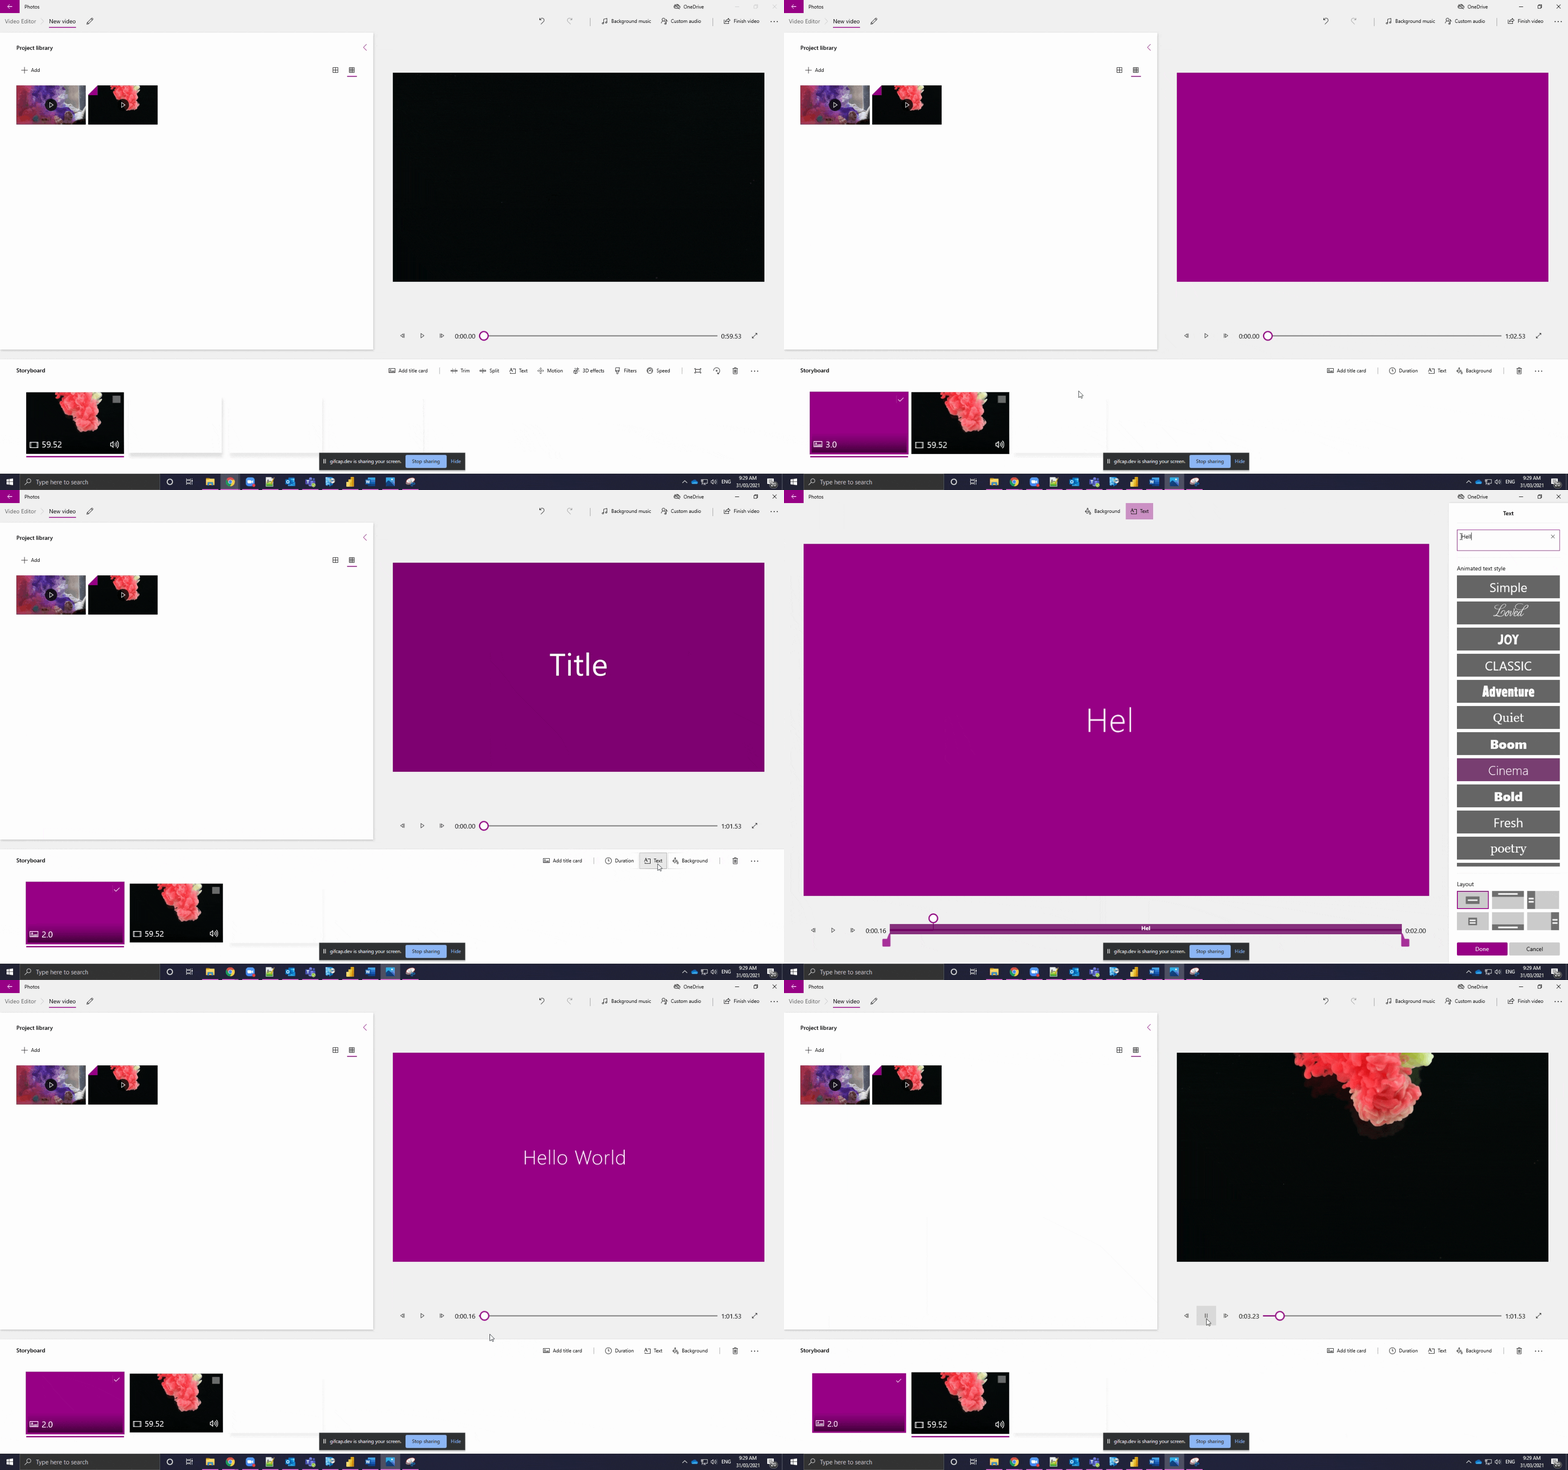
1. Select the Add title card button from the editing menu in the Storyboard. This will insert a new three second section to the start of your video.
2. You can then select the new title section in the Storyboard and click the Duration button to change the length of the title section.
3. Next, select the Text button to change the font/animation style and follow the remaining steps in Option 1 above.
Part 4 - Exporting your video
1. Once you are finished editing, you can export the final video. Click on the top-right Finish video button, select the quality of the video you wish to export, then select your destination folder, and finally give your video a name and click Export, as per below:
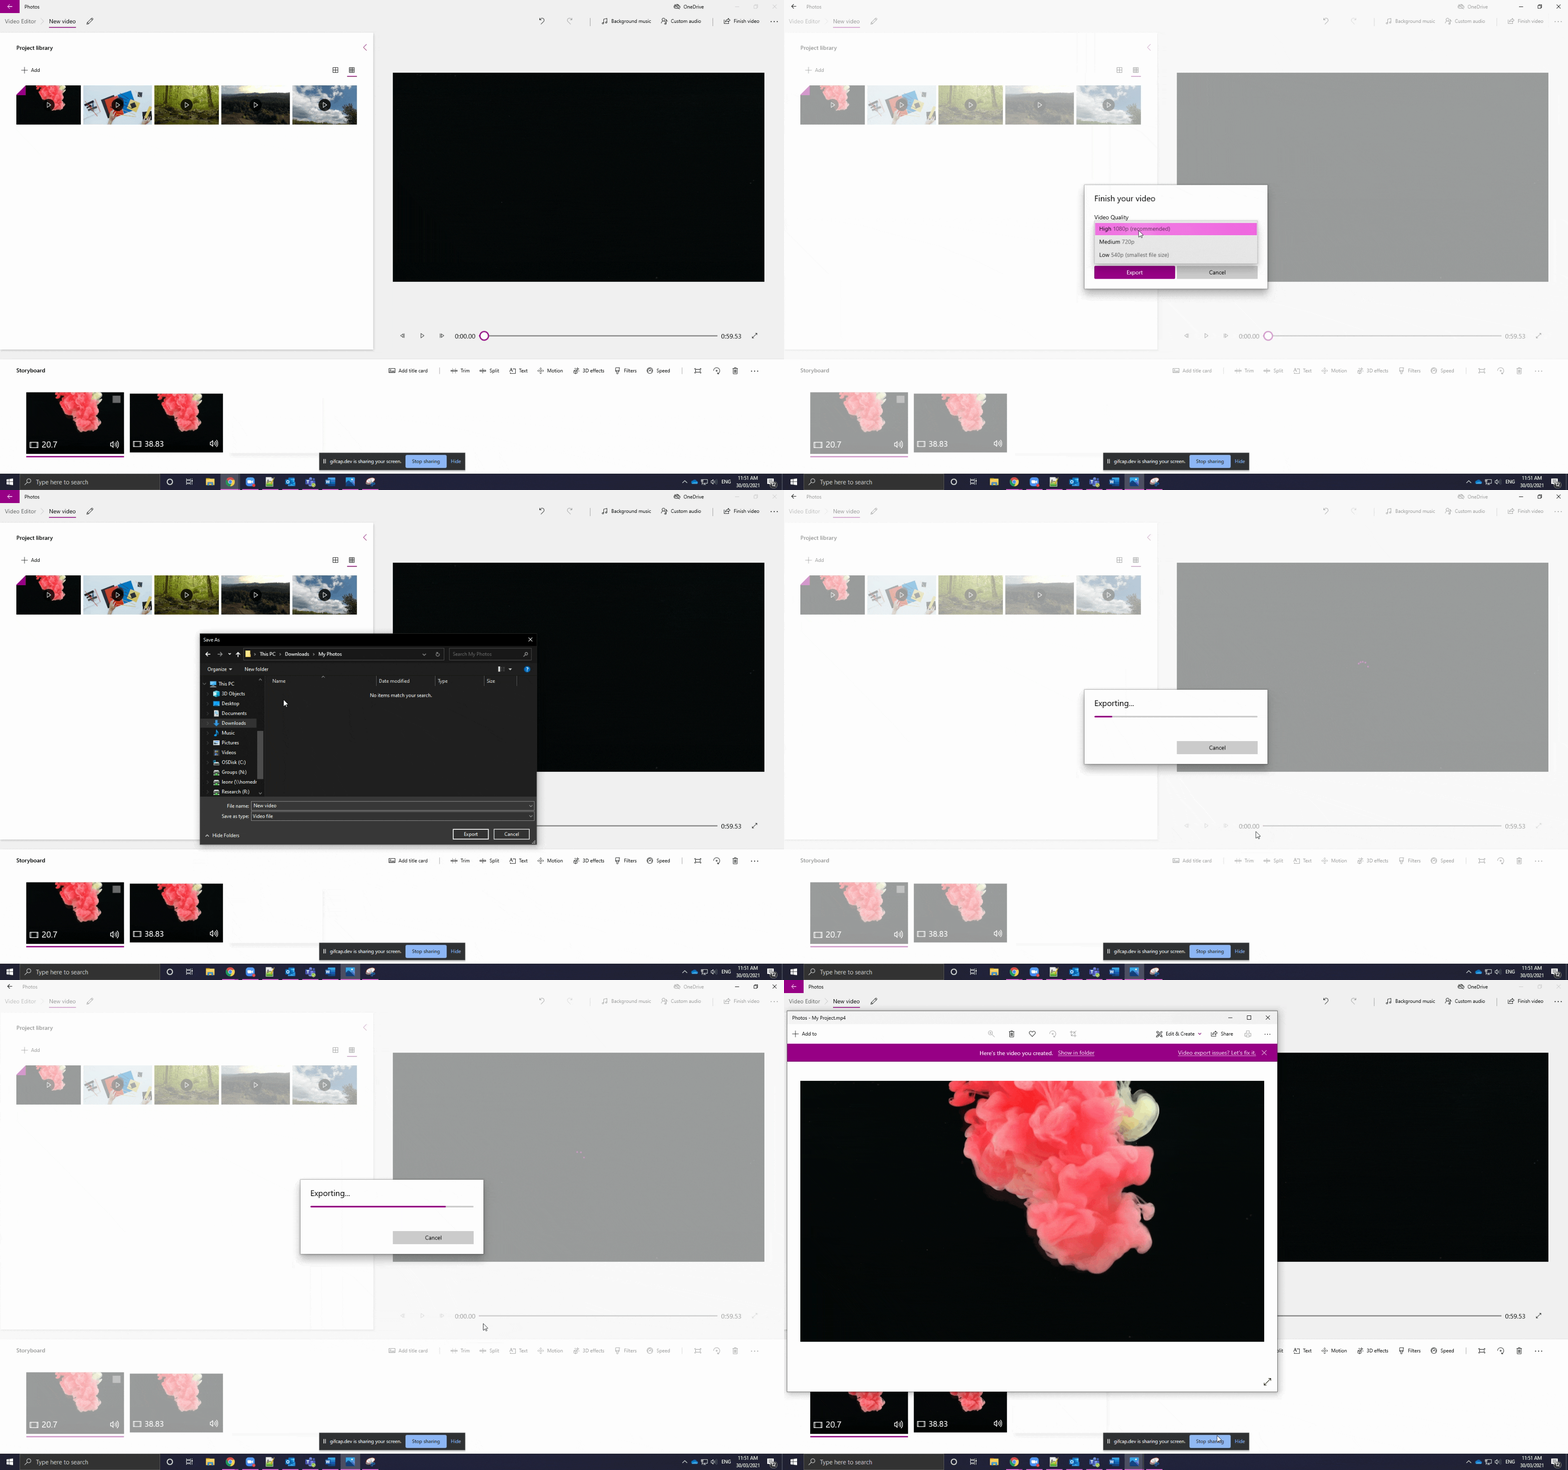
2. Exporting will create an .mp4 file in the chosen destination folder, which you can then upload to your Echo360 account or to the UC Staff Uploads YouTube channel (details below):
- Sign in to YouTube
- Username: ucme.staff.video@gmail.com
- Password: UCMe2019Vid
Part 5 - Further uses
1. There are several other effects and features you can utilise in the Video Editor, such as text-over-video, combining videos, and filters.
2. You can find out more about these other features via this Microsoft support page.